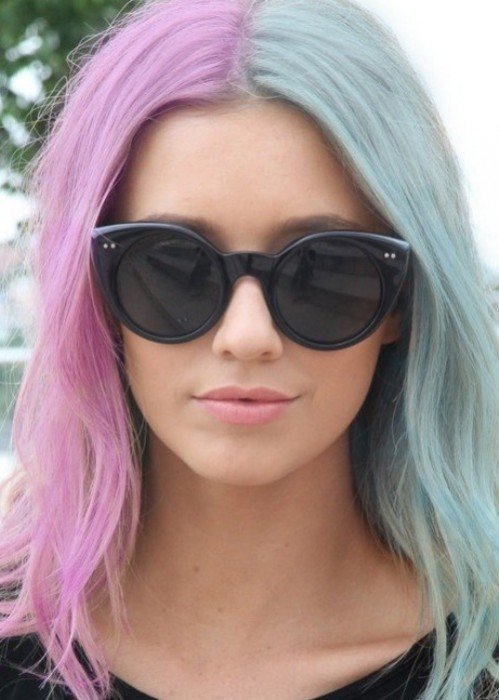
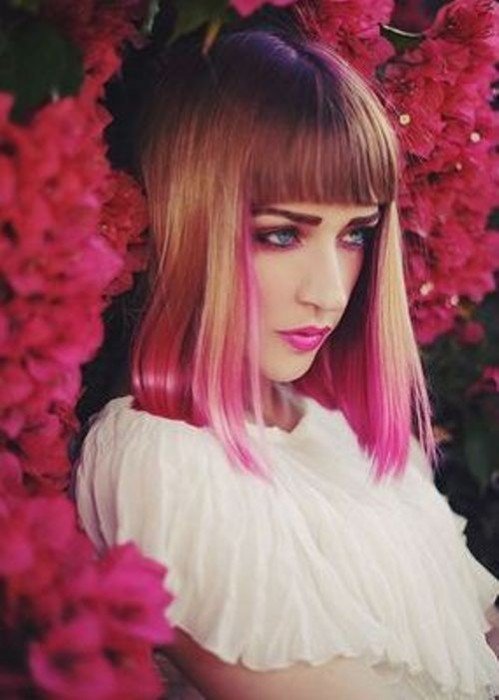
On the lookout for a hair colour transformation, but not enthusiastic on permanent and damaging chemical hair dyes? You can try experimenting with non-permanent, temporary hair dye rather! It’s entertaining, fleeting, and super-easy to do by yourself at home. There are lots of temporary hair styling techniques, but we’ve chosen 8 strategies to Temporarily Dye Your Hair to provide you with the very best choices for colouring your locks fast and reversibly.
The results often vary as a result of different hair types, colours, and requirements, but each one of these techniques have been tried, tested, and demonstrated to offer great results if done properly. Temporary hair colours are great for experimenting with new appearances at home, trying a striking look to get a party or a night out, or simply for expressing your present mood or your personality. The possibilities are only limited by your imagination!
1. Hair Chalking

Hair chalking is one of the easiest ways to add a temporary pop of color to your hair. It’s easy to employ, and it comes off after a couple of hours (depending on how often you touch your own hair!) Or if you wash your hair. It works on both dark and light hair, and it won’t damage your locks in any way. You’ll need proper soft chalk pastels – NOT normal chalk, since this will not work. It can get messy, so you may want to wear an old t-shirt and gloves when applying the chalk for your hair.

Dark hair:
- Wet a section of hair, and comb through it carefully
- Wet your chosen colour pastel somewhat, and then rub it on your hair in a downwards motion (never up, this will cause dreadlocks)
- Leave to air dry, and then seal the color with heat with a flat iron or curling iron
- Style hair and attempt to avoid touching it!
Light/blonde hair:
- Keep your hair dry (just wet it if you want a long last shade )
- Twist a part of hair and then apply your desired color with a dry piece of chalk
- Seal with heat (flat iron or curling iron)
2. Temporary Hair Color Spray

Temporary hair color spray is an enjoyable way to dye your own hair crazy, bright colours. You may use it to change your hair colour for a day, and you can use stencils to spray patterns on your tresses! Some colored hair sprays contain glitter, which makes them ideal for fancy dress or celebrations. The color washes out after one shampoo, so you can experiment with any colour you want. If you have very pale blonde hair or bleached/dyed hair, the color may stain or come out amusing, so you might want to attempt one of those other temporary hair dyeing methods instead. Lasting time: a couple of hours, comes out with a single thorough wash.
How To:

- Shake the can well, then hold it about 20 cm in your mind before spraying on the color onto your hair.
- If you want to use a number of colors, use a paper towel to cover sections of hair to keep them different – this can allow for more vibrant colors.
- For long hair, you might need at least two cans for a full head of colour.
- Take care to not inhale the spray, or get it in your eyes!
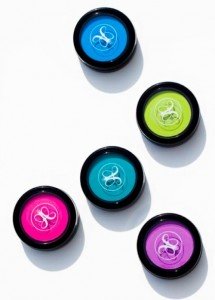
3. Anastasia Hypercolor Brow and Hair Powder

It is a lot easier than chalking, and also the bright powder colors are amazingly vibrant on all hair colors. But, applying the colors is time intensive and very cluttered, so you’ll want to prepare properly to prevent staining your clothing or counter-tops! With the ideal tools, you will get fabulous results.

- Prepare closely – you may require a leave-in conditioner or hair serum to extend a foundation for the hair to stick tohair spray, a brush, gloves, an old towel or t-shirt, and hair clips. It’s best to use the colour in the toilet since it is a very messy procedure.
- Brush out your hair, apply the leave-in conditioner to the tips of your own hair, then divide it into sections.
- Put on your gloves, then drape the towel over your shoulders, and sandwich one of those colour discs between your hair section and your thumb. Drag it downwards (never up!) To apply color. Repeat until you get the desired colour intensity.
- Set with hair spray, and fashion as usual!
4. Eye Shadow

Coloring your hair with eye shadow is a less costly alternative to buying expensive temporary hair coloring products like Anastasia Hypercolor or Hair Flairs Color Rub, also it gives an equally vibrant colour. It’s best to use eye shadow that comes in small pots or tubs, which means you can rub it straight onto your hair rather than mixing a dye. I would recommend using old eye shadow and not your favorite or most expensive brand, however pretty the colour is. Lasting time: A couple of hours, based on the quantity of transfer.
How To:

- As you would when coloring your own hair together with the Hypercolor baskets, shield your clothing and skin with a towel over your shoulders, and wear gloves. It can get really messy!
- Rub a bit of conditioner to the area of hair you need to color, and brush your hair carefully.
- Sandwich the pot between the part of hair along with your thumb, and rub on downwards to apply the colour. Keep applying colour until you are pleased with the outcome.
- Use hairspray to seal the colour – this might not always function, so experiment with different ways (warmth, other hair goods ).
5. Food Coloring

Employing food coloring (the kind that you purchase in tiny bottles at the baking section of the supermarket) is also a remarkably simple way to whiten your own hair. It is technically a semi permeable hair dye, as it lasts for many washes, and might linger for weeks in light blonde hair. Bear that in mind prior to dyeing your hair every color of the rainbow, as it might be stuck that way if your hair is lighter and more absorptive! Food coloring functions well for a full head of colour, provided that you apply it evenly. Lasting period: 1 week to 3 months, depending on hair type and colour.

- Place the towel on your shoulders and put some food colour of your preference into a disposable cup.
- Employ the color evenly with a toothbrush, taking care to keep the shade away from the skin round your ears, face, and throat. It may stain, so we advocate protecting your hairline using vaseline before beginning.
- Leave your hair to absorb the dye for 15 minutes.
- Blow dry your hair, and don’t wash it for at least 24 hours. The initial wash will likely eliminate excess dye, so use old towels to prevent staining.
6. Kool Aid

This brightly colored juice concentrate can dye your hair beautifully, but it could also stain damage or hair it depends heavily on your own hair, and your own method. We recommend trying it out to the tips of your hair , or on just 1 strand, to see how your hair reacts. This way, you can prevent any hair color disasters! The colours are vibrant and bright, and the application is rather easy. Fantastic for dip-dying and more.

- Select a colour (or mixture of colours ) of unsweetened Kool Aid or some similar colored juice concentrate and buy three or more sachets, less for a subtle color and more for quite a bright color.
- Mix the contents of the sachets into a bowl with hot or warm water. Leave it to cool for a little, as you don’t want to hurt your hair.
- OR, mix Kool Aid in a bowl with an easy white hair conditioner until you get the color you desire.
- Drape a towel over your shoulders, put on some glasses, and dip your own hair into the remedy, leaving it at the coloured water for 2-5 minutes. With the conditioner version, paint it on your hair with a hair dye brush. This can be messy!
- Let hair dry, then wash it in cold water. If you want your hair to remain extremely bright, you can let it dry and then only wash it after 24 hours.
7. Colored Mascara

Colored mascara is incredibly simple to apply, and it’s well suited to adding colored streaks to your hair, or developing a dip-dyed effect on the hints. You can purchase colored mascara in most stores that sell makeup, although the color range is somewhat limited. Waterproof mascara delivers the best results, as it will not transfer. Lasting time: one shampoo.

- If you have mild or blonde hair, simply use the color with the mascara wand, using only downward strokes. Let me dry, and you are all set!
- When you have dark hair, you may have to use a white mascara primer for the colour to stand out. You may use lemon juice to lighten stripes of hair prior to adding your colour, but keep in mind that the highlights will continue much longer than the color that you employ! To make natural highlights with lemon juice, then mix some freshly squeezed lemon juice using leave-in conditioner along with a teaspoon of olive oil. Apply the solution to sections of hair you wish to lighten, and then sit in sunlight for some time!
8. Colored Washable Markers

Colored mark are another fast and effortless way to temporarily dye your hair. There are many procedures to dye your own hair with mark, which range from coloring your locks using the nib into making a liquid dye using the ink, but we’ve picked the easiest method that you save time and messy experiments. Lasting time: 1 week to 1 month

- Prepare with gloves and a paper towel to prevent stains, and wear a classic t-shirt.
- Eliminate the back of the marker, and pull the plastic tube which holds the dye-soaked felt.
- Wearing gloves, then cut the tube open and pull on the felt out. Then wet it with a few drops of water so the shade will move readily.
- Rub the sensed onto your own hair in a downwards motion until you get the colour you desire. You may need to squeeze the color out of the felt on your hair.
- Allow it to dry and set with hair spray.
These are the very best ways to temporarily dye your hair – have you tried any of these methods? Tell us your ideas and experiences in the comments!


Leave A Comment